
Tools Required:
1. USB flash drive with a minimum capacity of 4
GB.
2. Windows 7 set-up DVD.
3. Windows 7/Vista
Step-1: Plug-in your USB flash drive.
NOTE: In the command prompt, type in the following yellow command:
Step-2: Open run and type DISKPART

Step-3: LIST DISK

This will show you a list of available disks on your system. Disk
0 is usually the hard disk. Disk 1 is the
USB drive (this can be a different one in your case).
Step-3: SELECT DISK 1
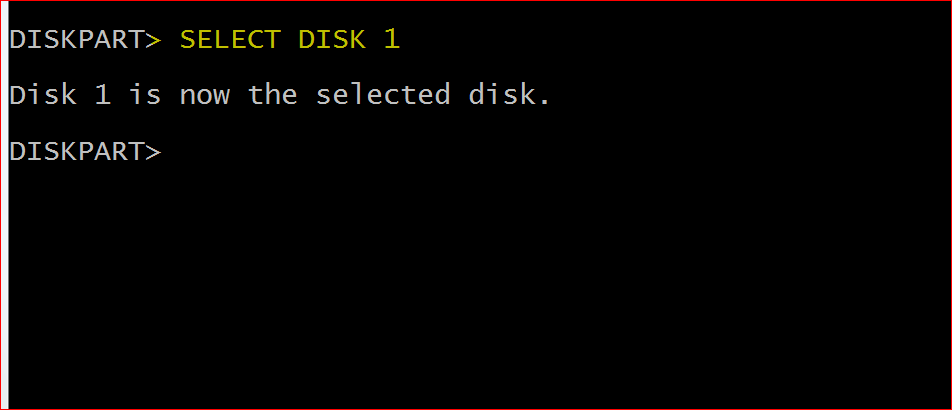
NOTE: 1 is the USB drive number on my system. If you
have a different number on your system, then you need to replace 1 with that
number.
Step-3: CLEAN

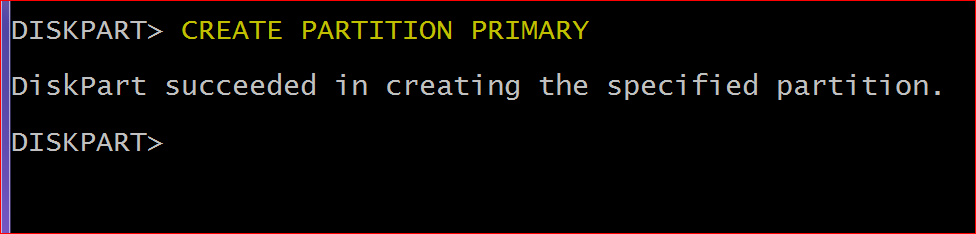
Step-3: CREATE PARTITION PRIMARY
Step-4: SELECT PARTITION 1

Step-5: ACTIVE

Step-6: FORMAT FS=NTFS QUICK

Step-7: ASSIGN

Step-8: EXIT

Step-9: Open command prompt as administrator

NOTE: Insert the Windows 7/Vista installation disc and note down the “drive letter” of your DVD drive. In my case, it is “E:”.Now type the following commands
Step-10: E:
(NOTE: E: is your DVD drive letter)

Step-11: cd boot
Step-12: BOOTSECT.EXE /NT60 H:
(NOTE: H: is your USB drive letter)

Step-13: EXIT
Step-14: Copy the contents of your Windows 7/Vista installation disk into the USB flash drive.

That’s it! Your USB pen-drive is now ready
Don’t forget to enable the “USB Boot” option and change the “boot priority to USB device from hard disk” in your BIOS settings.
I hope you like this post. Pass your comments to express your opinion.